# はじめに
こんにちは!Dify便利ですねー。今回は、Windows環境でDifyをアップグレードする方法をご紹介します。Linux版の手順は以下に執筆したのですが、Windows版もほしいよね!ということで書いてみました。
https://qiita.com/daishiro_jp/items/23d34af1021cb91de7f8
# この記事の対象者
- Windows上でDocker Desktopを使ってDifyを動かしている方
- Difyをアップグレードしたいけど、ちょっと不安な方
- コマンドラインは使えるけど、そんなに詳しくない方
# アップグレード手順
### 1. PowerShellを管理者として起動
スタートメニューでPowerShellを右クリック→「管理者として実行」を選択します。
### 2. 現在の変更状態を確認
```powershell
# Difyのディレクトリに移動(インストール場所に応じて変更してください)
> cd C:\path\to\dify
# 変更状態の確認
> git status
```
### 3. バックアップを取る(大事!)
```powershell
> cd docker
# 設定ファイルのバックアップ
# 単純に.oldという拡張子をつけてバックアップします
> copy docker-compose.yaml docker-compose.yaml.old
> copy .env .env.old
```
#### Point:Docker Volumeのバックアップ
Docker Desktopならボリュームのバックアップも簡単です!
1. Docker Desktopを開く
2. 左メニューの「Volumes」をクリック
3. 必要なボリュームを右クリック→「Export」でバックアップ完了!
こんなかんじです。便利な機能ですね。。
[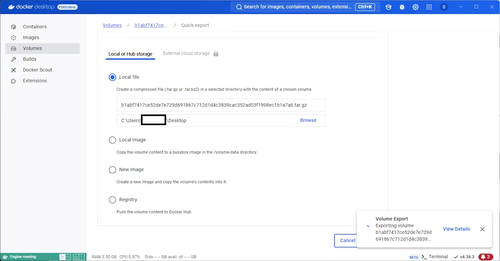](/attach/d4781075daa4ddaea4a6a0cc81de6d3c883e26975494a8859eb602b06c9c162e.png)
### 4. 変更を一時退避
```powershell
> cd C:\path\to\dify
> git stash
```
### 5. 最新版を取得
```powershell
# mainブランチに切り替え
> git checkout main
# 最新のコードを取得
> git pull origin main
(ガッツリ結果が並びます、略します)
```
### 6. サービスを停止
#### コマンドラインで停止する場合:
```powershell
> cd docker
> docker-compose down
[+] Running 11/11
✔ Container docker-sandbox-1 Removed 1.2s
✔ Container docker-weaviate-1 Removed 0.7s
✔ Container docker-nginx-1 Removed 11.1s
✔ Container docker-ssrf_proxy-1 Removed 11.4s
✔ Container docker-worker-1 Removed 12.6s
✔ Container docker-web-1 Removed 10.6s
✔ Container docker-api-1 Removed 13.0s
✔ Container docker-db-1 Removed 0.7s
✔ Container docker-redis-1 Removed 0.7s
✔ Network docker_ssrf_proxy_network Removed 0.3s
✔ Network docker_default Removed
```
これが終わると、Docker Desktop上のContainersもスッキリと、何もなくなります。
[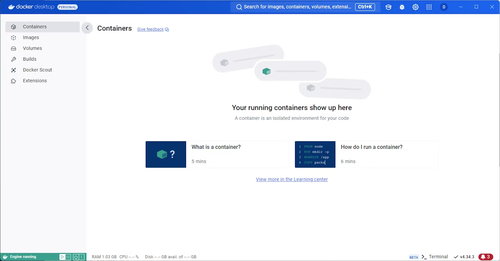](/attach/44df4ce7328d3645919f1d7143a2947b088be44b6db4d6dbebc3169a2c4a9b50.png)
#### Docker Desktop GUIで停止する場合:
1. Docker Desktopを開く
2. 「Containers」をクリック
3. Dify関連のコンテナを選択
4. 「Stop」ボタンをクリック
どっちが簡単かは、判断わかれるでしょうね。お好きな方で。
### 7. 設定ファイルを更新
```powershell
# バックアップと新しい設定を比較(fcはWindows版のdiff)
> Compare-Object (Get-Content docker-compose.yaml.old) (Get-Content docker-compose.yaml)
> Compare-Object (Get-Content .env.old) (Get-Content .env)
```
必要な変更を反映します。VSCodeなどのエディタで編集すると楽ですよ!
### 8. サービスを再起動
```powershell
> docker-compose up -d
[+] Running 28/28
✔ api Pulled 101.7s
✔ a480a496ba95 Already exists 0.0s
✔ 9555349e8380 Already exists 0.0s
✔ 1c161e44b06b Already exists 0.0s
✔ 417516d8bb61 Already exists 0.0s
✔ d197aa066fee Pull complete 4.1s
✔ 2e3a189d6ded Pull complete 8.5s
✔ 4f4fb700ef54 Pull complete 8.5s
✔ a85ccdde7f53 Pull complete 46.6s
✔ 33fbb0aac3f9 Pull complete 95.3s
✔ 16a8041c47d4 Pull complete 96.3s
✔ fd8313391acd Pull complete 97.3s
✔ 94bc503e60f9 Pull complete 97.4s
✔ worker Pulled 101.7s
✔ web Pulled 26.3s
✔ 4abcf2066143 Already exists 0.0s
✔ 9f16480e2ff5 Already exists 0.0s
✔ 092226d52cac Already exists 0.0s
✔ 0493dfb2ff9c Already exists 0.0s
✔ 32cdc670699a Pull complete 1.0s
✔ 8b3c0aa85eca Pull complete 1.0s
✔ af3000ec4d41 Pull complete 1.1s
✔ 5d6f0ea61668 Pull complete 2.0s
✔ b169f7bdc92a Pull complete 5.5s
✔ 035dcc618757 Pull complete 5.7s
✔ 0b201a402996 Pull complete 5.8s
✔ 1ab40d49a6cb Pull complete 5.8s
✔ b8b6ee54ae2c Pull complete 22.0s
[+] Running 11/11
✔ Network docker_default Created 0.1s
✔ Network docker_ssrf_proxy_network Created 0.0s
✔ Container docker-weaviate-1 Started 3.2s
✔ Container docker-redis-1 Started 3.1s
✔ Container docker-sandbox-1 Started 3.2s
✔ Container docker-db-1 Started 3.2s
✔ Container docker-web-1 Started 3.3s
✔ Container docker-ssrf_proxy-1 Started 3.3s
✔ Container docker-api-1 Started 3.6s
✔ Container docker-worker-1 Started 3.6s
✔ Container docker-nginx-1 Started
```
Docker Desktopの画面でもいい感じに立ち上がっていることが確認できますよ!
[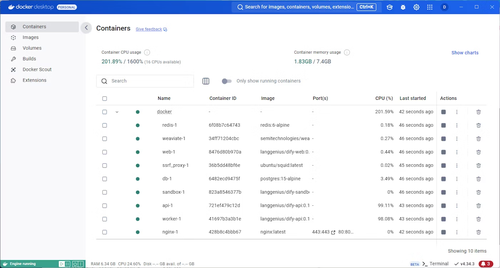](/attach/aa23882a4331b1026da6edd579a969f7d19c636c33e3856ad9fc18ed7180473b.png)
### 9. 動作確認
ブラウザで `http://localhost` (または設定したポート)にアクセスして、ちゃんと動いているか確認しましょう!
[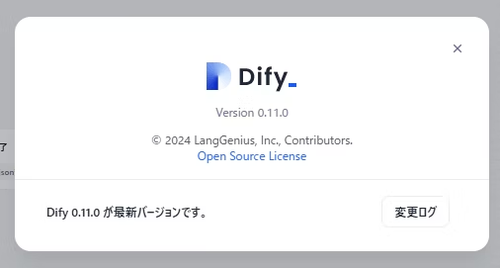](/attach/ba10aa65e20aedda1c92a2fce61b61618476c1fe0182e5dec445933d36d3299c.png)
# トラブルシューティング
未検証ですが、参考のために以下の方法を書いておきます。
### ログを確認したい場合
```powershell
> docker-compose logs -f
```
### バックアップから戻したい場合
1. サービスを停止
```powershell
> docker-compose down
```
2. バックアップを復元
```powershell
> copy "docker-compose.yaml.*.bak" docker-compose.yaml
> copy ".env.*.bak" .env
```
3. Docker Desktopから以前エクスポートしたボリュームをインポート
4. サービスを再起動
```powershell
> docker-compose up -d
```
# まとめ
Windows環境でもDifyのアップグレードは怖くありません!ポイントは、
1. 必ずバックアップを取る
2. Docker Desktopの便利な機能を活用する
3. 問題があったらすぐに戻せるように手順を理解しておく
これで皆さんも安全にDifyをアップグレードできますね!新機能を楽しみましょう!最後まで読んでいただき、ありがとうございました!この記事が皆さんのお役に立てば幸いです。